How to Prevent SCOM Notification Storms
IT Service Management
I have seen many cases at customer sites where SCOM alerts create serious stress on their mail environment. As a single event on a monitored IT asset can quickly create a cascade of alerts on related components, it is not uncommon to see hundreds of emails a day generated by SCOM. However, many of the recipients are only interested in receiving a single SCOM alert notification warning them that end users are not able to use a business service or even better than a business is about to become unavailable. This is exactly one of the unique selling points of Live Maps. We will notify only when really necessary and provide a URL in the notification to the root cause details.
This article explains how you can configure SCOM alerts to include a URL to the Live Maps service map in an email.
To verify the configuration in this scenario we make use of an example service.
This scenario has three steps:
- Creating a SMTP channel that formats and sends the service alert emails
- Creating valid Subscriber that will receive the service alert emails
- Creating a Subscription that scopes the service alert emails
1. Creating a SMTP Channel
- Open the SCOM Operations console
- Go to the Administration pane
- Select Channels under Notifications in the Administration tree
- From the Task pane select ‘New Channel –E-Mail (SMTP)’
- The E-Mail Notification’s Channel wizard opens
- In the Description step enter a Channel name (eg: SMTP Channel – Live Maps Service Alerts)

SCOM email notification channel screenshot
- Enter a Description name (eg: SMTP channel to send Live Maps Service Alerts)
- Click Next
- In the Settings step Add a valid SMTP server and reply address
- Click Next
- In the Format step enter the following text in the E-Mail subject field:Service Alert: $Data[Default=’Not Present’]/Context/DataItem/ManagedEntityDisplayName$ – $Data[Default=’Not Present’]/Context/DataItem/AlertName$ – Status: $Data[Default=’Not Present’]/Context/DataItem/ResolutionStateName$
- Enter the following text in the E-Mail message field:
Alert: $Data[Default=’Not Present’]/Context/DataItem/AlertName$
Service: $Data[Default=’Not Present’]/Context/DataItem/ManagedEntityDisplayName$
Status: $Data[Default=’Not Present’]/Context/DataItem/ResolutionStateName$
Last modified time: $Data[Default=’Not Present’]/Context/DataItem/LastModifiedLocal$
Alert description: $Data[Default=’Not Present’]/Context/DataItem/AlertDescription$Open service map: http://192.168.59.157:52909/default.aspx?moid=$Data[Default=’Not Present’]/Context/DataItem/ManagedEntity$ - Replace the URL in the E-Mail message with a valid server and port name of the Live Maps web console in your environment
- Click Finish to save the settings
2. Creating a Subscriber
- Open the SCOM Operations console
- Go to the Administration pane
- Select Subscribers under Notifications in the Administration tree
- From the Task pane select ‘New’
- The Notification Subscriber wizard opens
- In the Description step enter or select a name for the subscriber (eg, IT Management)
- Click Next
- In the Schedule step enter a valid schedule
- In the Addresses step click Add
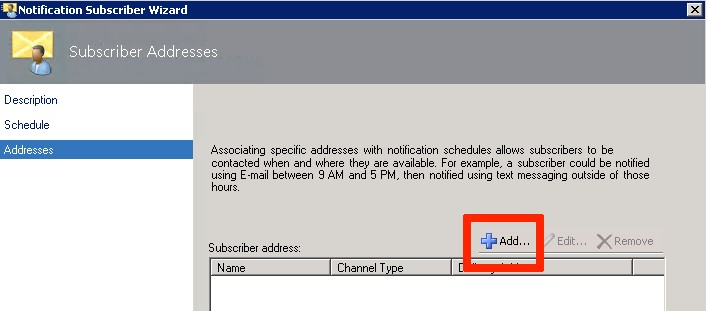
SCOM Notification Subscriber Wizard screenshot
- The Subscriber address wizards open
- In the General step enter a name for the addressee.
- Click Next
- In the Channel step select ‘E-Mail (SMTP)’ as Channel Type
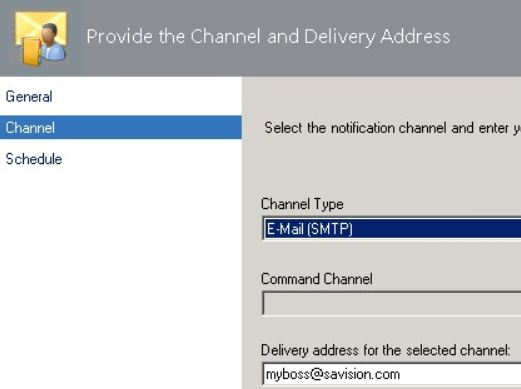
Enter a valid Delivery address
- Click Next
- In the Schedule step select a ‘Always send notifications’
- Click Finish to save the settings
3. Creating a subscription
Within the subscription you determine for which services and for which health state categories service alerts are forwarded to email. For example you can forward only ‘End User Availability Problems’ SCOM alerts for a given service.
This scenario will describe how to forward all service alerts for all services but you can completely fine-tune it to your needs in the Criteria section.
- Open the SCOM Operations console
- Go to the Administration pane
- Select Subscriptions under Notifications in the Administration tree
- From the Task pane select ‘New’
- The Notification Subscription wizard opens
- In the description, step enter a Subscription name (eg: ‘Live Maps Service Alert Subscription’)
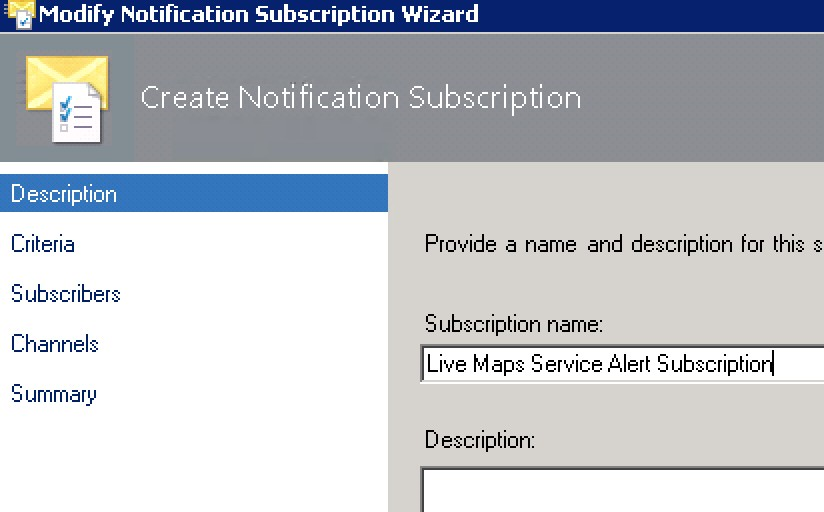
Click Next
- In the Criteria step select ‘created by specific rules or monitors (e.g. sources)’ as Condition
- Select the specific hyperlink in the Criteria description
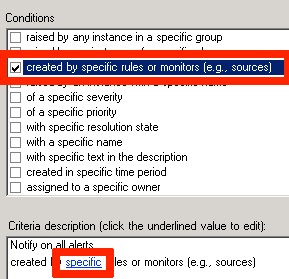
Select “created by specific rules or monitors”
- The Monitor and Rules Search dialog opens
- Note: If you want to scope the subscription to specific services select the ‘raised by any instance of a specific class’ condition and specify the service objects
- Select the ‘Savision Live Maps Service Library’ management pack
- Click Search
- Select all monitors in the Available rules and monitors section and click Add
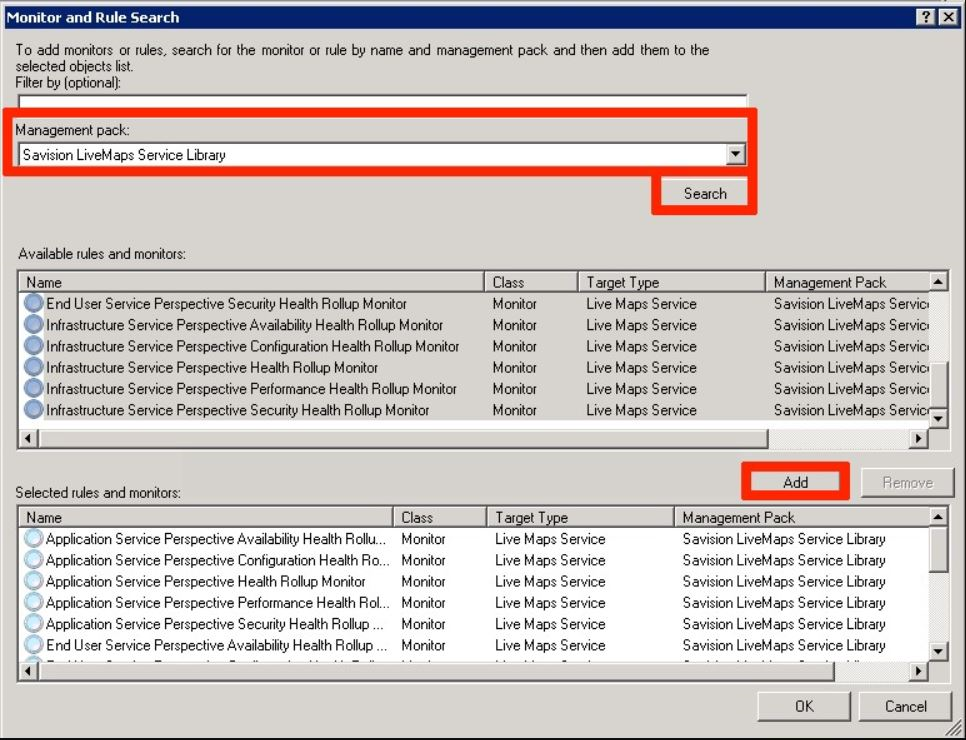
- Click OK to confirm you selection
- Click Next
- Note: if you only want service alerts to be forwarded for specific perspectives (eg ‘End User’) or specific health categories (eg ‘Availability’) then you should only select those monitors here
- In the Subscribers step Add the subscriber created in section 2
- Click Next
- In the Summary step click Finish to create the subscription
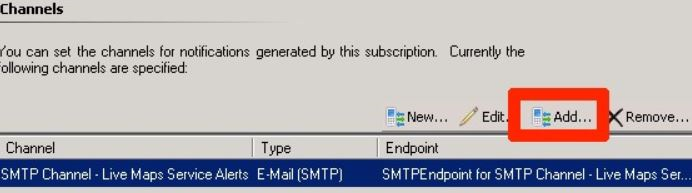
Add the SMTP channel
- Click Next
- In the Channel step Add the SMTP channel created in section 1
Test the Email Subscription
The test described in this section is based on the Live Maps Getting Started application. It assumes that the application is installed and configured as described in the Getting Started Guide. Before playing the scenario verify if the ‘Order Entry’ service used in the example is in a healthy state. If not, use the Reset option in the Getting Started application to return it to a healthy state.
- Launch the Getting Started application: ‘All Programs\Savision\Live Maps Getting Started’
- When prompted provide SCOM login details
- When the Getting Started application has been loaded play Scenario 1


- Open the SCOM Operations console
- Go to the Monitoring pane
- Open the All Service Alerts view in the Monitoring tree
- Verify if the two service alerts have been generated for the Order Entry service
- Open your email client of preference to open the mailbox of the addressee configured in the subscription
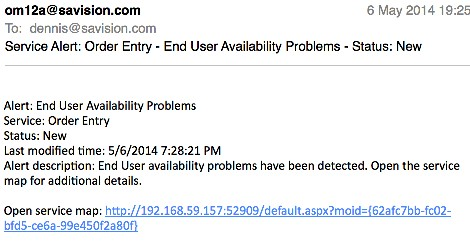
SCOM service alert email with Service Map Link
- Click the service map URL in the email
- The Service Map of the Order Entry Service should open

Order Entry Service Map in Live Maps
Conclusions on SCOM Alerts:
By sending only relevant SCOM notifications and giving people direct access to all the context of an outage you will dramatically improve response times and time to resolution (and you’ll save some mail storage too!)